Google Maps is a powerful tool that helps people find businesses and get directions. Often customers open Google Maps in search of a cafe, shop or service provider that’s within close proximity. If your business isn’t listed on Google Maps then you’re missing out on prospective customers. It’s fundamental for businesses to be listed on Google Maps to increase visibility and thus, increase sales.
Adding your business to Google Maps might sound difficult at first however, the process can be completed in just a few clicks… here’s how.
Step 1: Sign up for a Google Business Profile
This step is applicable to those who haven’t set up a Google Business Profile. If you already have a GMB account, move to Step 2.
You won’t be able to do much without a Google business account. Setting up a Google business account should be high up on your to-do list and available online before you even sell your first product. You can add your business to Google by clicking here and following the prompts.
Follow the simple steps provided by Google to set up your Business Profile. Ensure to select, “Yes” when you’re asked whether you would like to “add a location.” Even if you’re a sole trader or freelancer with no one location, it’s still beneficial to choose an address you usually work from in order to appear on the Google Maps directory.
If you’ve completed this step properly, you can move to Step 3.
Step 2: Access Google My Business (GMB)
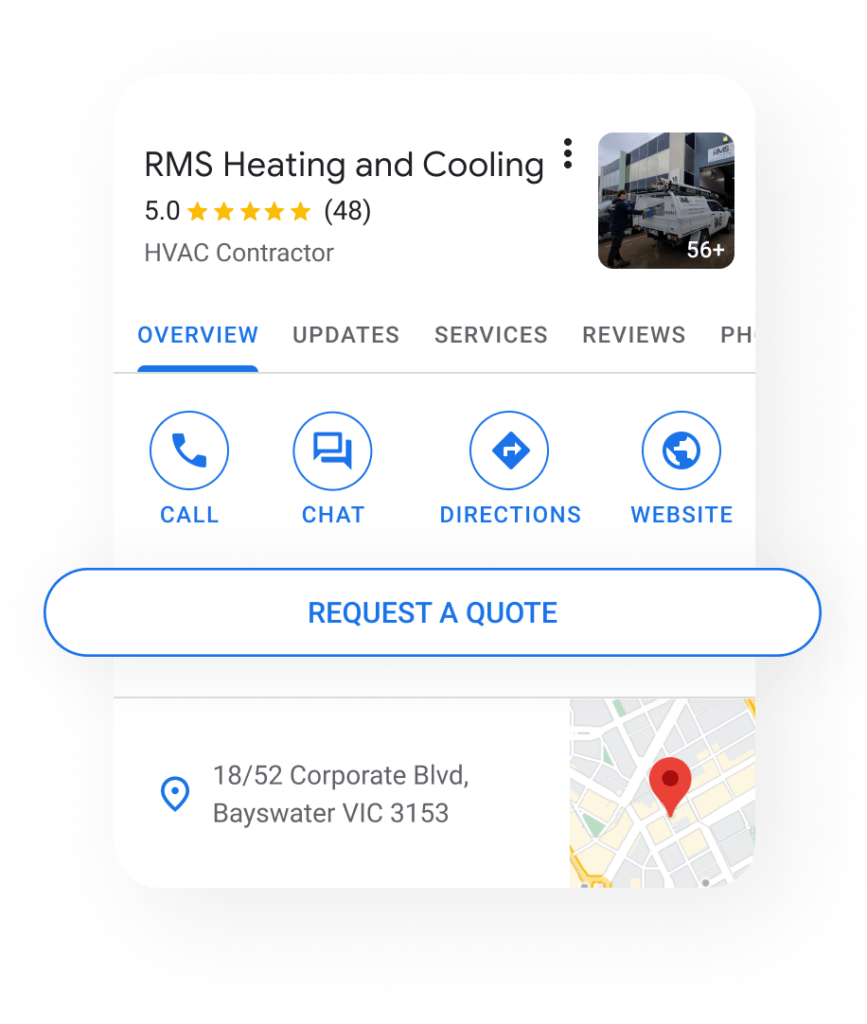
Once you have a Google account, you’ll need to access Google My Business, also known as GMB. This is a free service that allows you to manage your business information on Google, including Google Maps. To access Google My Business, go to www.google.com/business. Once you’ve landed on this page, you can choose either “Sign in” or “Manage now” in the top right corner. If you’re already signed in head on over to “Manage now” and you’ll be taken to your Google My Business dashboard.
Step 3: Verify your business information
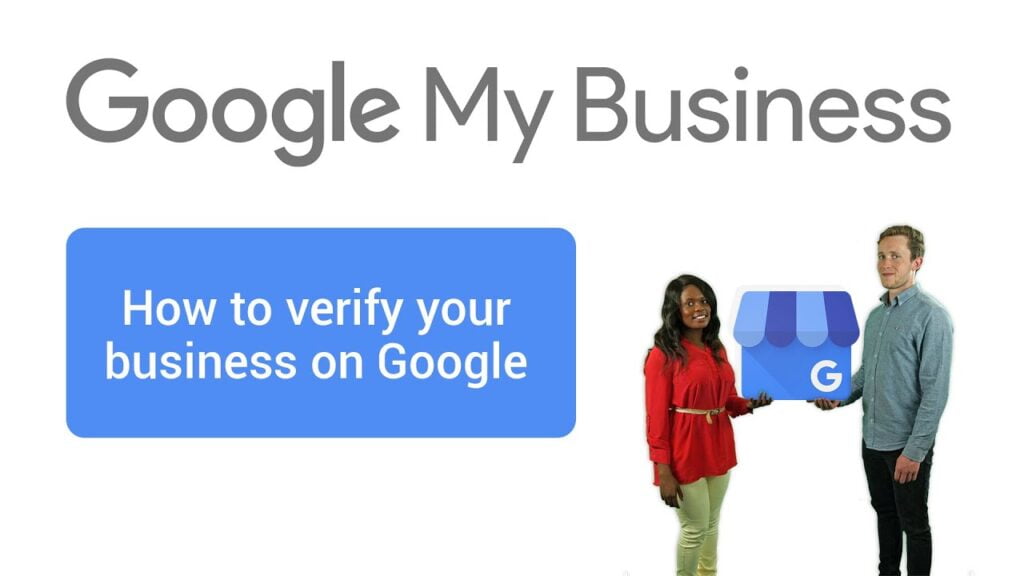
When you access Google My Business, you’ll need to verify your business information. This is done to ensure that Google Maps displays accurate information about your business. To verify your information, Google will send a verification code to your business address. You can choose to receive the code by mail or by phone.
If your business is not yet verified, it will not appear on Google Maps or in search results until the verification process is complete. To get your Google My Business account verified, you’ll need to follow a few simple steps. Here’s how:
1. Log in to Google My Business:
Go to the Google My Business website and sign in using your Google account.
2. Add your business information:
If you haven’t already, make sure to add all the details about your business, including its name, address, phone number, and website.
3. Initiate verification:
In your Google My Business dashboard, you’ll see an option to “Verify now.” Click this button to start the verification process.
4. Choose your verification method:
Google offers several ways to verify your business, such as postcard verification, phone verification, or instant verification for eligible businesses. Choose the method that works best for you.
5. Complete verification:
Depending on the method you’ve chosen, you’ll need to follow the instructions to receive your verification code and enter it into your Google My Business dashboard.
6. Wait for confirmation:
The verification process can take a few days to complete, so be patient. Once your account is verified, you’ll see a notification in your dashboard, and your business information will be live on Google Maps and in search results.
If you have any issues during the verification process, don’t hesitate to check out the Google My Business Help Center for helpful resources and support.
Step 4: Enter your business information
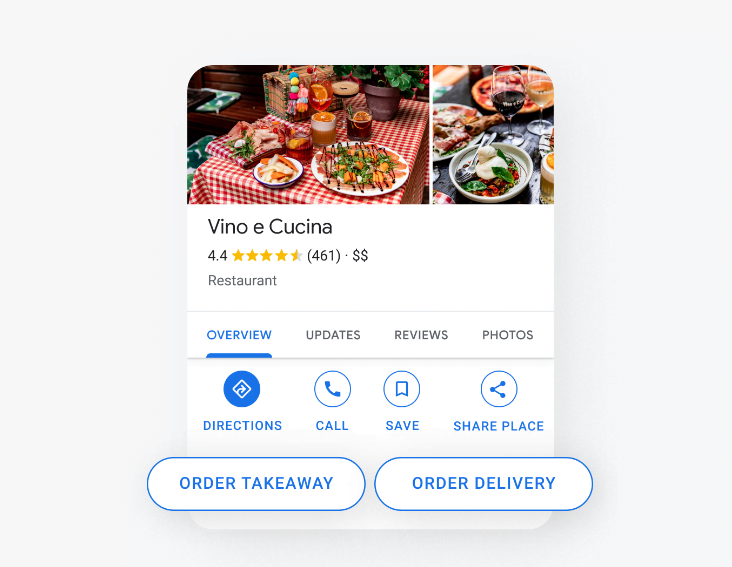
Once you’ve verified your information, you can start entering your business information. This includes your business name, address, phone number, website, and other details. Make sure to enter accurate and up-to-date information, as this will help potential customers find your business on Google Maps.
For example, if your opening hours are incorrect, customers will arrive at your venue excited to try your product only to be met with a “closed” sign hanging on the front door. What was initially excitement and eagerness to experience your business’ offerings quickly transforms into confusion, disappointment and (worst case scenario) a bad Google review. Ensuring your business information is uptodate maintains customer trust and loyalty and therefor, increasing sales.
Once you’ve logged in, you’ll be taken to your dashboard, where you can view and edit your business information. To edit your information, click on the relevant section, such as “Info” or “Location,” and make any necessary updates. Once you’ve made your changes, be sure to save them and then publish the updates so that your customers can see the most accurate information about your business on Google Maps and in search results.
Note: If you have multiple locations, you’ll need to add each location individually and verify each one separately.
Step 5: Add photos and other media
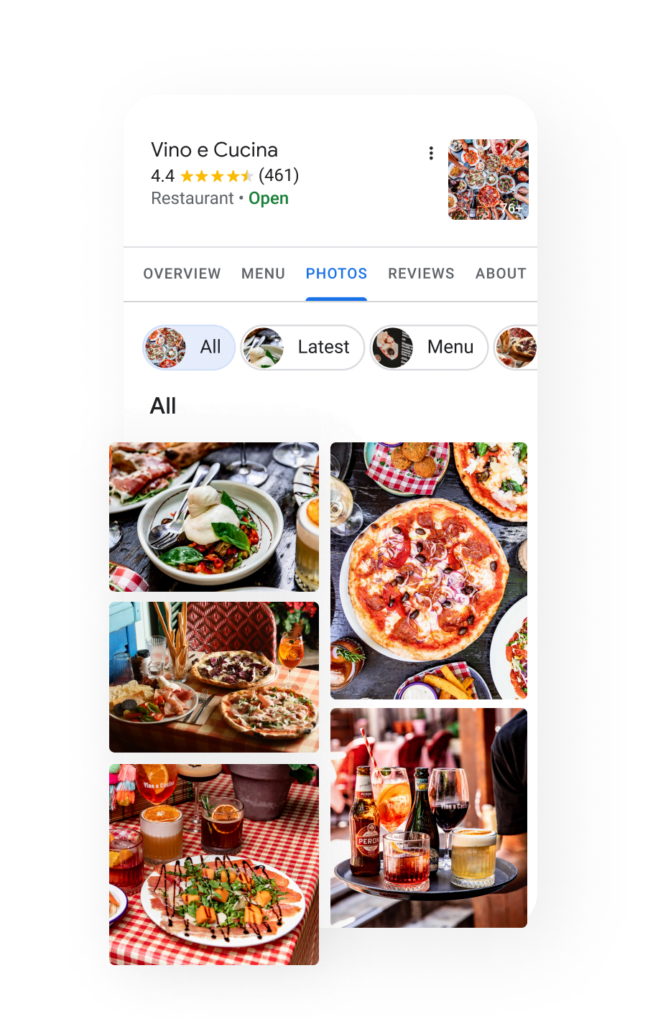
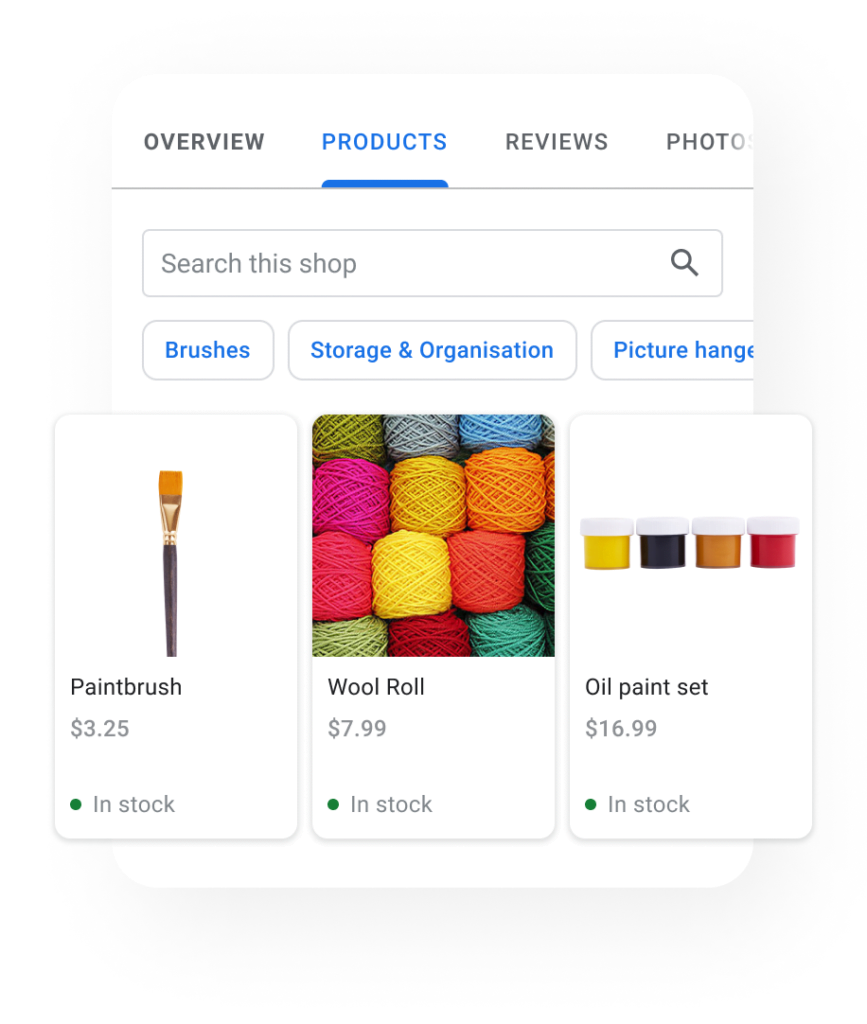
Google My Business allows you to add photos and other media to your listing. This can help potential customers get a better idea of what your business is about and what it offers. You can add photos of your products, services, store interior, and more. You can also add videos and other multimedia content to enhance your listing.
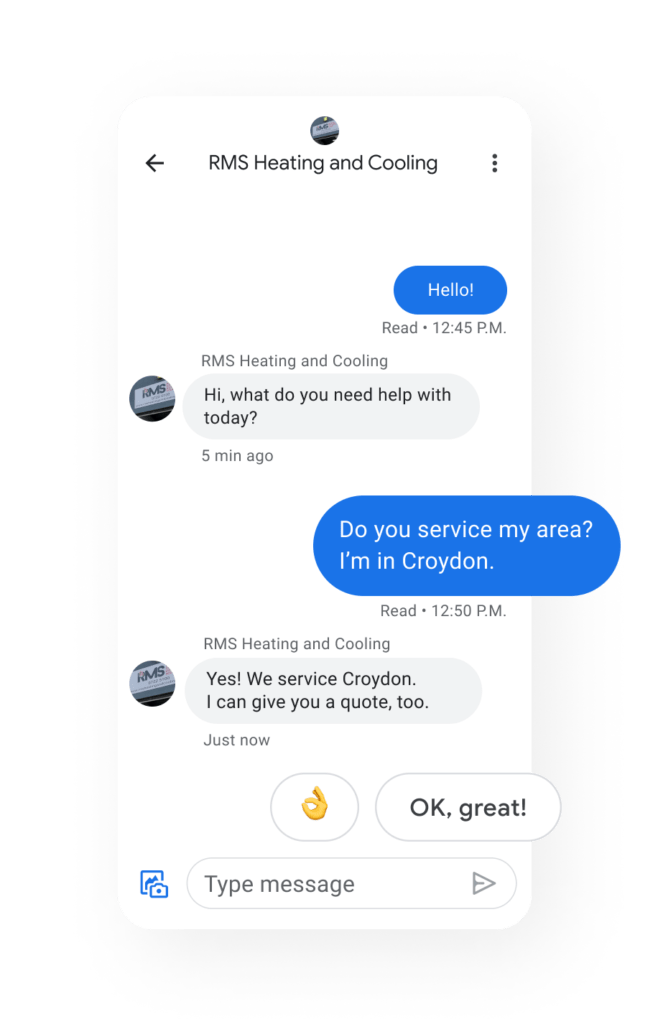
Alongside photos, you can add business updates (important messages, COVID updates, special events and resharing blog content), products, services, offers, Q&As and bookings. Depending on your business will determine the relevancy of these features however, the more touchpoints you have with your customers, the better. With the right touchpoints, you’ll be able to connect with customers like never before, and really make a name for your business!
Step 6: Optimize your listing
To get the most out of Google Maps, it’s important to optimize your listing. This includes using keywords in your business name and description, and adding categories that accurately reflect your business. Make sure to choose categories that are relevant to your business and that are commonly used by people searching for businesses like yours.
To find your keywords for your GMB listing, you can do research on your own accord and create a list of words and phrases customers would use to describe your busines as well as analyse competitors. Additionally you can use tools such as Google Keyword Planner, SEMrush, Moz Keyword Explorer, Ahrefs Keyword Explorer and many more to find keywords that are specific to your business and your customers, improving your visibility and credibility in Google search results.
Step 7: Respond to customer reviews
Google My Business allows customers to leave reviews about your business. These reviews greatly help potential customers get an idea of an experience with your business and often is the deciding factor why a customer will choose one business over another.
Whether it’s a positive review or a negative review, responding to customer reviews can help you build a positive reputation and show that you care about customer satisfaction. Whilst positive reviews work to increase your star rating, negative reviews are an opportunity for you to show your customers that you’re willing to adapt to the needs of your customers.
Take control of your online reputation, and show the world your dedication! Respond to reviews, and let your customer satisfaction be your affirmation!
Step 8: Monitor your listing
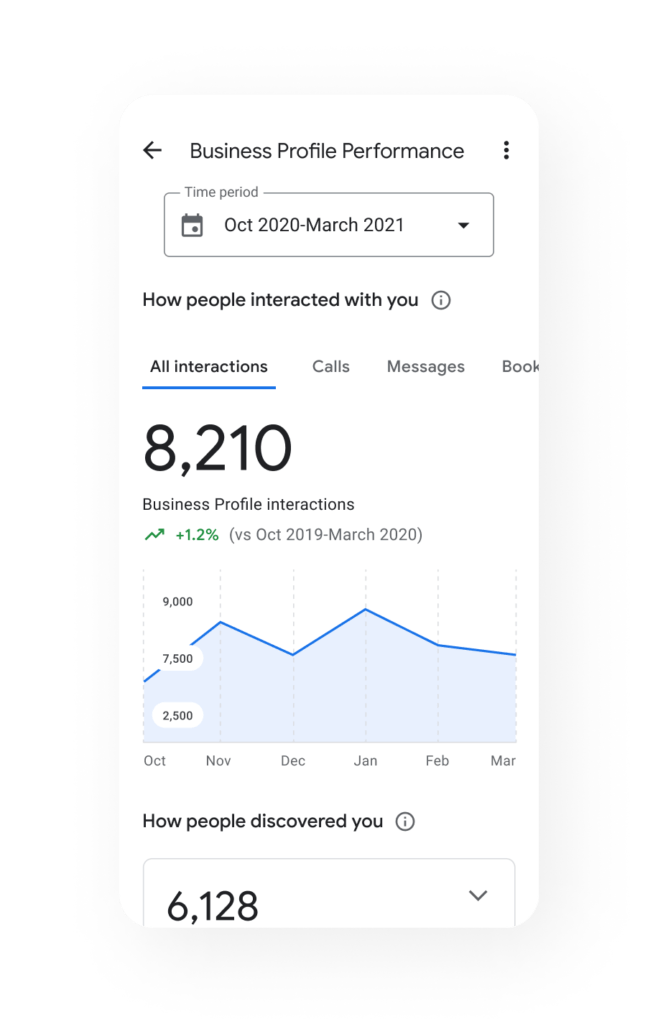
Once you’ve added your business to Google Maps, it’s important to monitor your listing to ensure that the information is accurate and up-to-date. If there’s a public holiday, another COVID lockdown or perhaps your customers are messaging your GMB—it’s essential to stay in the loop to ensure you’re maintaining your business’ reputation.
You can make changes to your listing at any time, and you should do so whenever your business information changes. By following the steps listed in Step 3: Verify your business information you’ll find all of the features to monitor your listing.
Need help with Google services?
Adding your business to Google Maps is a simple process that has a longlist of benefits for your Google My Business listing. Considering Google processes over 99,000 searches every single second (Internet Live Stats, 2022), you want to ensure your business not only pops up in position 1 on the SERPs but also accurately describes and represents your business. Maintaining your GMB details will increase visibility, reach more customers and build loyalty with the existing.
If you have any questions or need help adding your business to Google Maps, be sure to check out the Google My Business help center. Alternatively, chat to our Google experts at Cloud Cartel!